Primary & Secondary Ignition Patterns
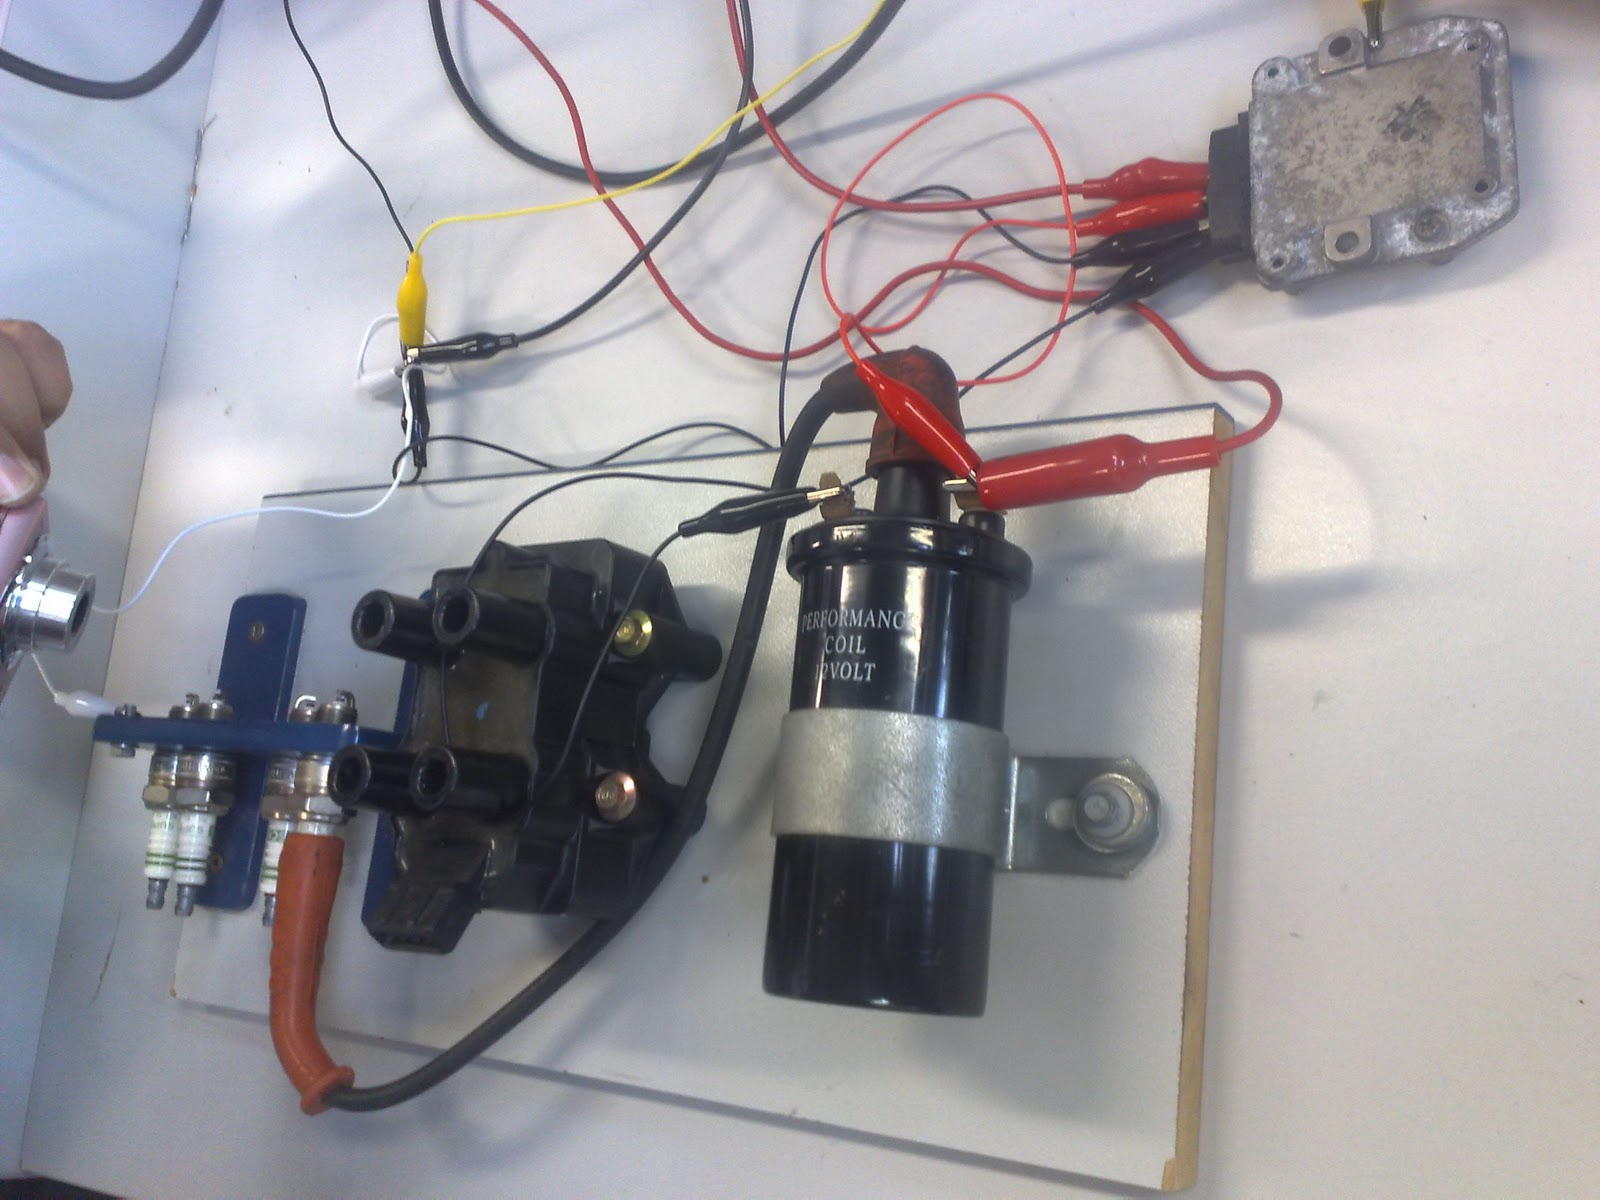
1.1 Set up a lab scope or ignition oscilloscope to view the the primary ignition pattern on lab scope, withe engine warmed up and idling.
1.2 Record the average
Firing Voltage for each cylinder in the chart below.
1.3 Record the average
Burn Voltage for each cylinder in the chart below.
1.4 Record the average
Burn Time in ms for each cylinder in the chart below.
1.5 Record the average
Dwell Time for each of the cylinder in the chart below.
1.6 Are all these primary ignition voltage readings
normal? YES please discuses what is normal or abnormal about pattern and what cause it?
Yes voltage readings are all normal. The firing voltage, burning voltage and dwell time are all constant for all 4 cylinders, if there were any difference in voltage either firing voltage, burning voltage or burning time for any cylinder that would be abnormal and the engine would not run smoothly, therefore the engine for this reading was ruining smoothly and no hesitation or mis firing detected.
CY # 1 | CY # 2 | CY # 3 | CY # 4 | Primary Ignition |
300 V | 300 V | 300 V | 300 V | Firing Voltage |
40 V | 40 V | 40 V | 40 V | Burn Voltage |
1.4 ms | 1.4 ms | 1.4 ms | 1.4 ms | Burn Time |
4.6 ms | 4.6 ms | 4.6 ms | 4.6 ms | Dwell Time |
1.7 Draw or phograph the primary ignition oscilloscope parade pattern from your scope into the box below. Do it carefully and show the detail you need to see for diagnosis. Record voltage and time scales.
1.8 Discuss what the primary display or parade pattern emphasizes for diagnosis. What can it help you see?
Print A is the dwell period that is when the coil is grounded. Point B is the current imiting and this will prevent heat being primary coil generated and the Point C is firing voltage when spark occurs. point D is the burning voltage shows. Point E is the back MF and return to zero.
2.0 Secondary voltage patterns
2.1 Set up your ignition oscilliscope or lab scope to view the secondary ignition patterns on your lab scope, with the engine warmed up and idiling.
2.2 Record the average
firing voltage
2.3 Record the average
Burn time for each cylinder in the chart below.
Are all these secondary ignition voltage readings normal? yes
discuss what is happening in the pattern and what it is telling you about the ignition system.
As from data we collected in the chart below shows all four cylinders here constant voltage and burning time at snap acceleration. The secondary coil spike tells us the ignition system. If firing (high voltage) and the burning time about to start, we see it is very fast with the full voltage spike takes about 0.6ms and burn time of about 1ms which is normal for the secondary pattern.
2.5 Do a
snap acceleration and record in the chart below how high the firing voltage (KV) went under snap acceleration.
Cyl 1 | Cyl 2 | Cyl 3 | Cyl 4 | Secondary ignition |
13 KV | 13 KV | 13 KV | 13 KV | Firing voltage (KV) |
1.6 ms | 1.6 ms | 1.6ms | 1.6ms | Burn Time (ms) |
yes | yes | yes | yes | Snap acceleration |
2.6 Are all these snap acceleration secondary ignition voltage readings normal? yes
Discuss what is happening and what the pattern is telling you.
The high firing voltage shows us the engine revs up and the amplitude increases as there is more demand or load the engine, therefore at the snap acceleration the ignition is building up higher voltage and do it quicker to keep up the engine speed.
2.7
Draw or photograph the secondary ignition lab scope pattern while idling from your scope into the box below. Do it carefully and show the detail you need to see for diagnosis.
2.9 Start the engine and let it idle (for only a short time.) Record the new firing voltage and burn time for all the cylinders in the chart below
Cyl 1 | Cyl 2 | Cyl 3 | Cyl 4 | Secondary ignition (one cylinder grounded) |
5 KV | 3 KV | 6 KV | 7 KV | Firing voltage (KV) |
5.9 ms | 3 ms | 3 ms | 3 ms | Burn Time (ms) |
2.10 Draw or photograph the
shorted secondary ignition waveform you see now on your scope.
2.11 Discuss what is happening in the shorted ignition pattern and how the ignition pattern tells you what is happening in the ignition system.
The graph shows us when the coil is shorted in the primary magnetic field collapsed and induces current into the secondary winding this is the secondary ignition spike which is about 3 KV in one milli second burning time progress to about 2ms.
2.13 Stop the engine and attach a spark tester to another spark plug wire. Start the engine and let it idle (for only a short time). Record the new firing voltage and burn time for all the cylinders in the chart below
Cyl 1 | Cyl 2 | Cyl 3 | Cyl 4 | Secondary ignition (spark tester on one cylinder) |
13 KV | 14 KV | 7 KV | 6 KV | Firing voltage (KV) |
3 ms | 1.5 ms | 3 ms | 3 ms | Burn Time (ms) |
2.14 Draw or photograph the spark tester secondary ignition waveform you see now on your scope. Show the details that is necessary for accurate diagnosis. include time and voltages
2.15 Stop the engine, remove the spark tester (be gentle), replace the spark plug wire, and run the engine to clear the spark plug. The engine should be back to normal.
2.16 Discuss what happens to the ignition waveform when the spark tester is attached to the spark plug wire. What does it tell you about the ignition system?
The three cylinders with the normal spark plugs shows no abnormality, all three cylinders had almost the same pattern spikes, burninig time of voltage except cylinder #2 the tester has much higher firing voltage about 15000v the burning time has reduced dramatically, this indicates as we have applied the string theory in this exercise the larger the gap, the higher firing voltage and shorter burning time
2.17 Remove the spark tester carefully, and put everything back together on the engine, Engine runs fine? yes.